
Layers in Statsig are huge time-savers to those who use them.
No code product experimentation is a topic I’m constantly talking with customers about. Usually we’re in one or more of the following situations:
You want to run repeatable experiments without needing to change code.
You want to experiment in a mobile app, but you are concerned about versioning, app store approvals, etc. slowing iteration speed.
Statsig has a unique solution for these problems: Layers.
Layers in Statsig allow variables (parameters) to be shared by many experiments. This means that once a Layer is integrated into your app's code, you can start, stop, or iterate on experiments within the Layer through the Statsig console without making further code changes.
How does it work?
Let’s walk through an example.
Here is a visual representation of a Layer in Statsig:
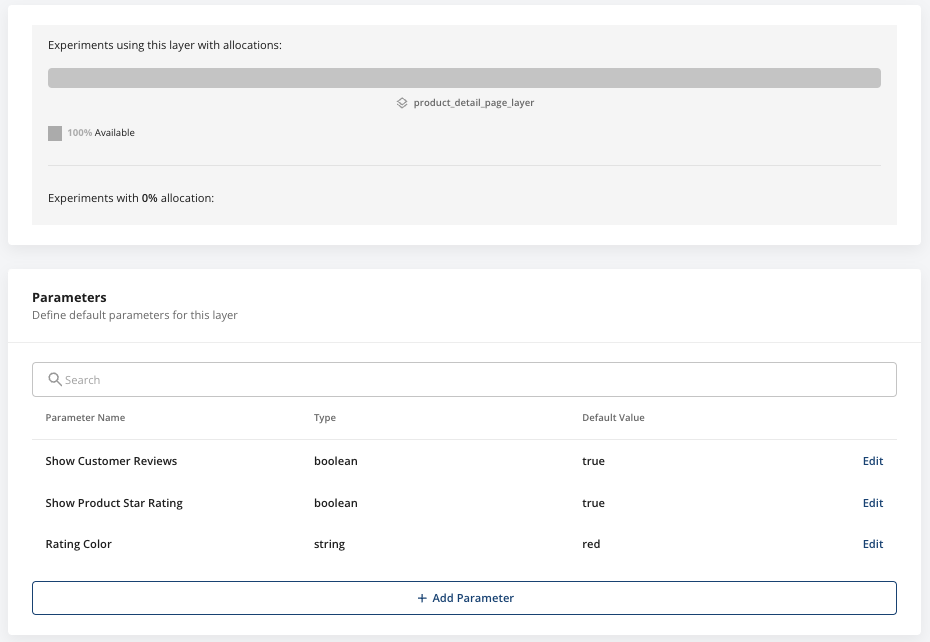
At the top, you can see a logical representation of your user population. In this case, I have no experiments within the Layer, so you can see “100% available.” We’ll explore creating experiments later, but want you to understand the Layer first.

Next, you see the parameters within the Layer. These are the shared variables that your experiments within the Layer may experiment on. We will dive deeper on parameters, but what’s important for you to understand right now, is that these parameters are the default parameters for the Layer.
If you aren’t running any experiments, these parameters are what will be served to your users.
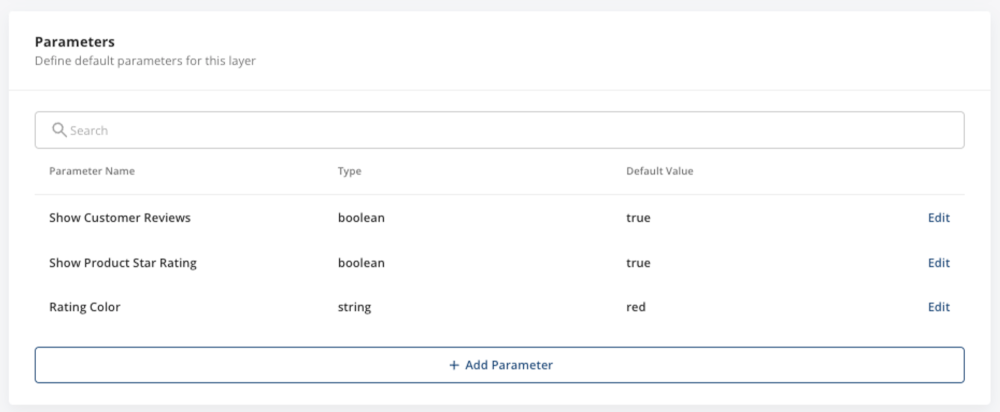
Installing the Layer into your app
Now, using a simple javascript example, I would do a one time implementation of my Layer in my app like this:
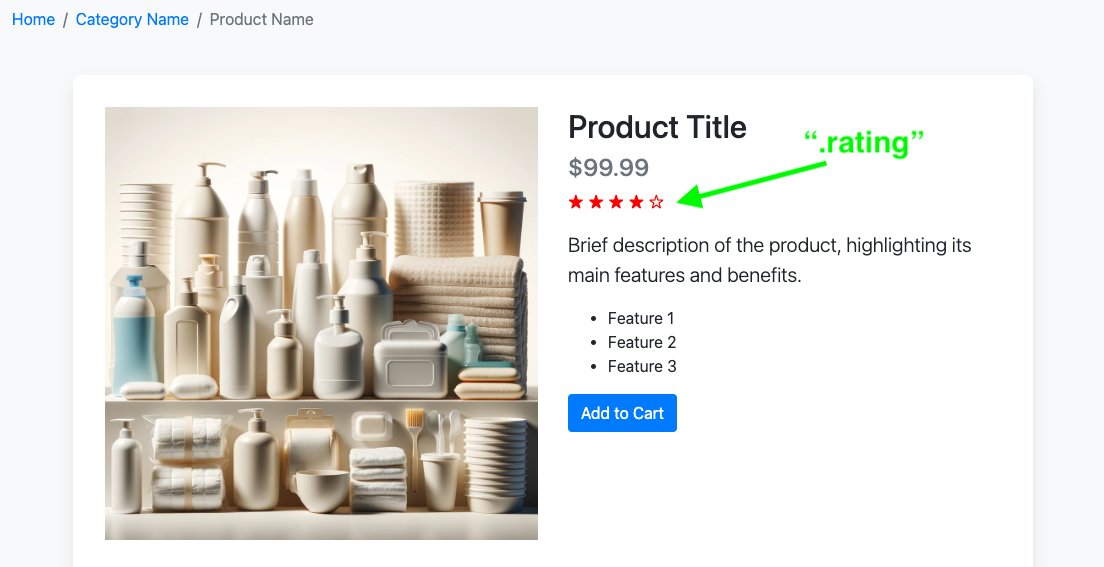
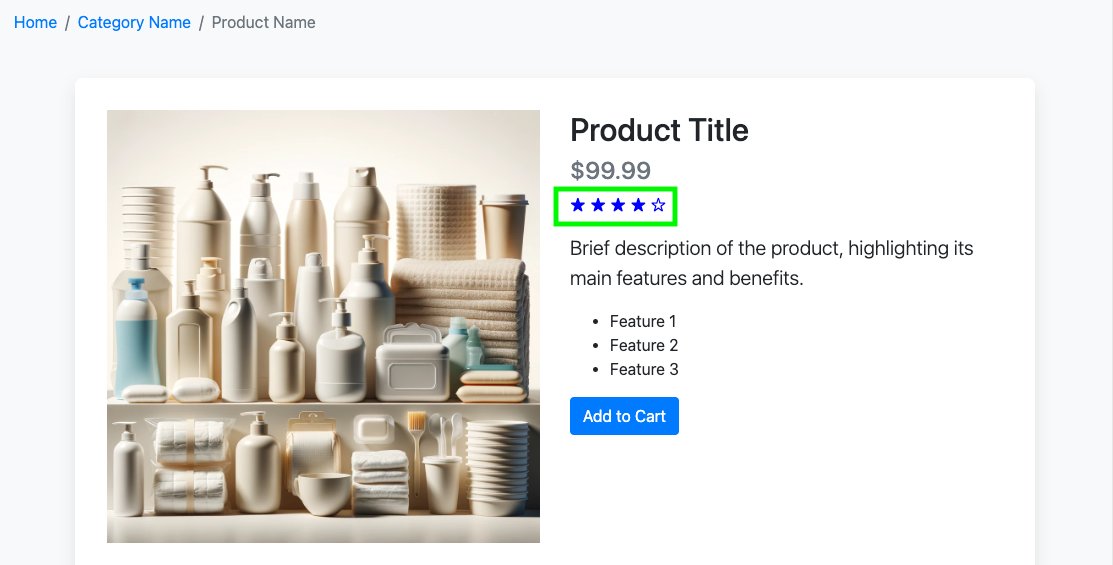
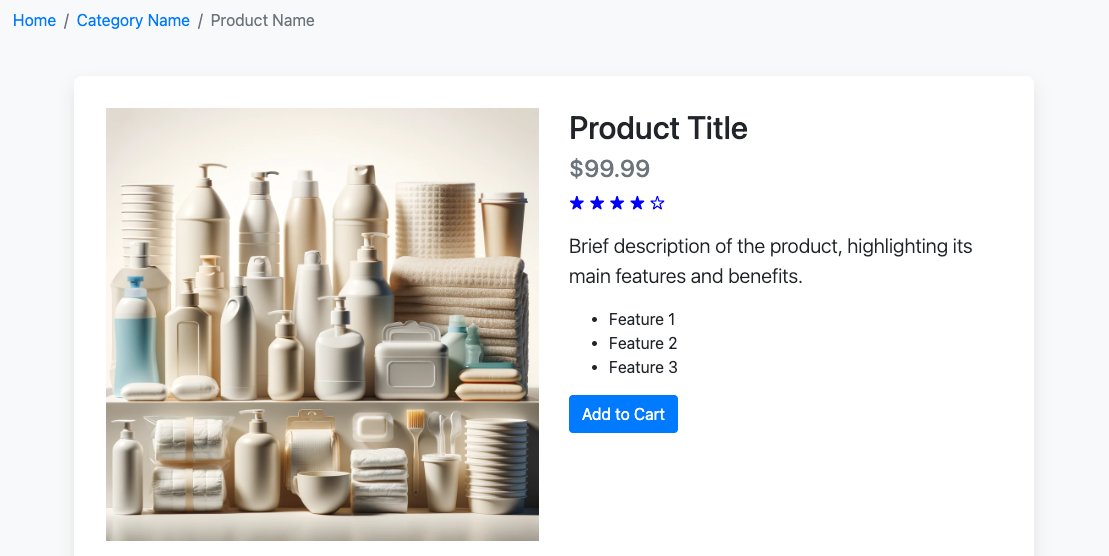
Since there are no experiments in my layer, my users will receive the default values in the Layer. I built a sample app to help illustrate the example:
Let’s say I change the default “Rating Color” in my layer to “blue”:
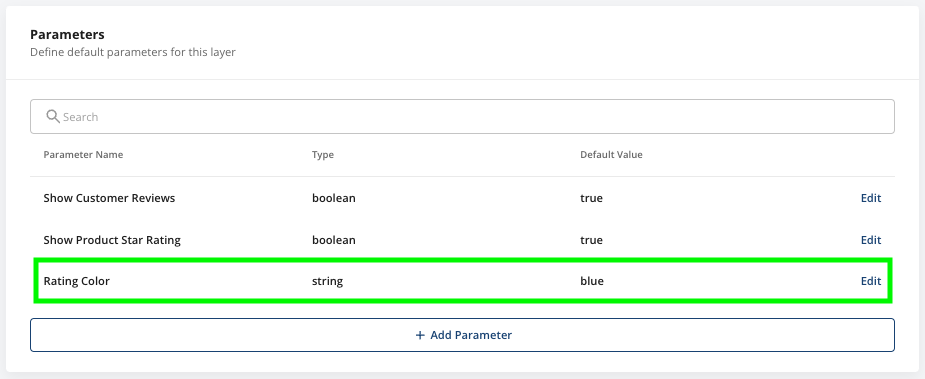
Then the default experience for users in my app reflects what you set in the Statsig console, no code change necessary:
And voilà, the one-time installation of the Layer is complete!
Setting up an experiment
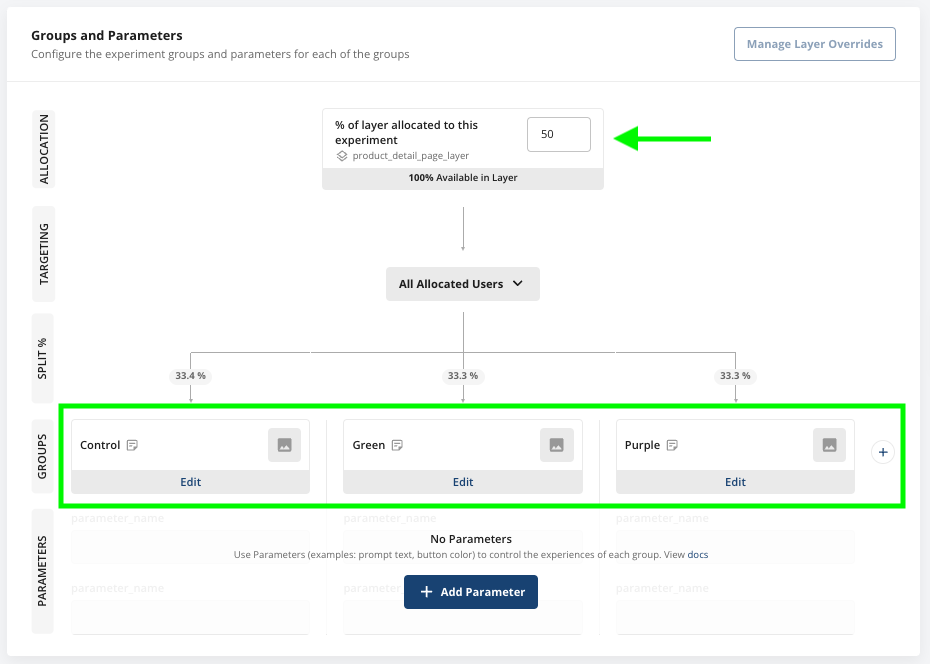
Now, I can run experiments using the parameters defined within the Layer. Let’s say I want to run an experiment on the “Rating Color” on the product detail page. I can set up an experiment in Statsig like so, where I’m using 50% of the user population within the Layer, and want to test 2 new rating colors:
When I click “Add Parameter” I will be prompted to select from the parameters available to me within the Layer:
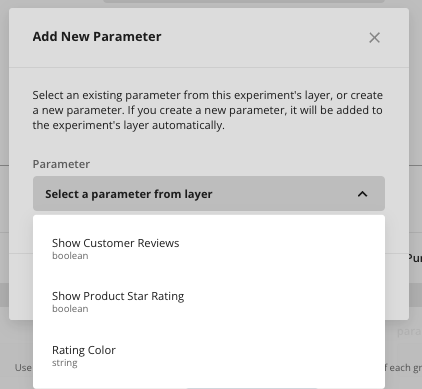
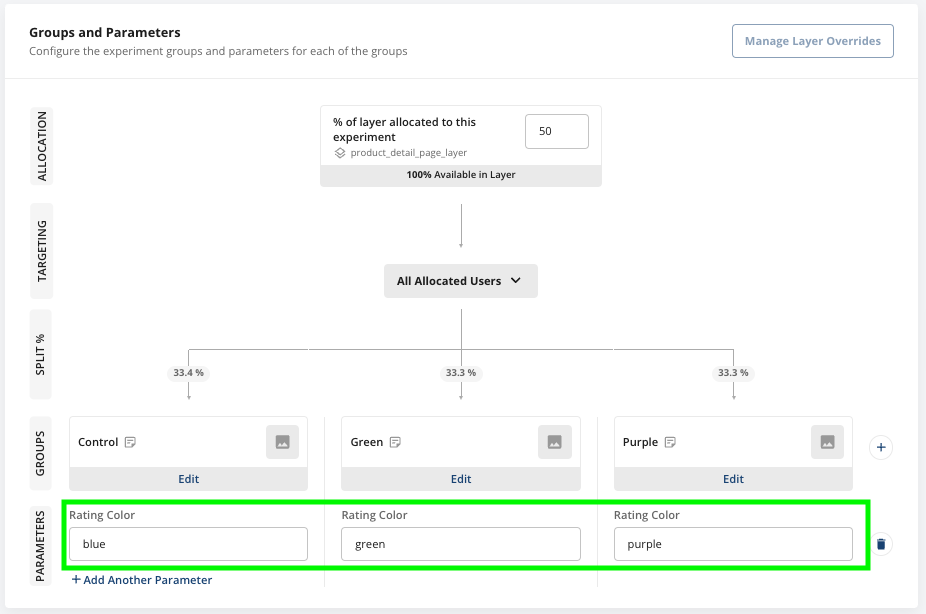
I select the “Rating Color” parameter, then add the color values that I want to test in my app to each group within the experiment:
I don’t need to change any code to deploy this experiment. Once I start the experiment in the Statsig console, it will be occupying 50% of the Layer, meaning 50% of my users will be allocated into this experiment:

Because rating_color_experiment is not experimenting on the “Show Product Star Rating” and “Show Customer Reviews” parameters but only on “Rating Color,” it will simply inherit the default “Show Product Star Rating” and “Show Customer Reviews” parameter values from the Layer and show those defaults to the 50% of users allocated to the experiment:

So, in this scenario, 50% of the users exposed to the Layer will not be allocated into the experiment, and will see the default Layer parameter values.


The other 50% of users will be allocated into rating_color_experiment, and will be evenly allocated into one of the following 3 variations:

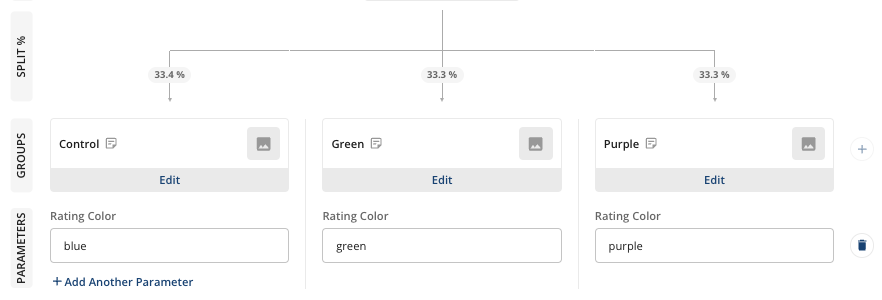
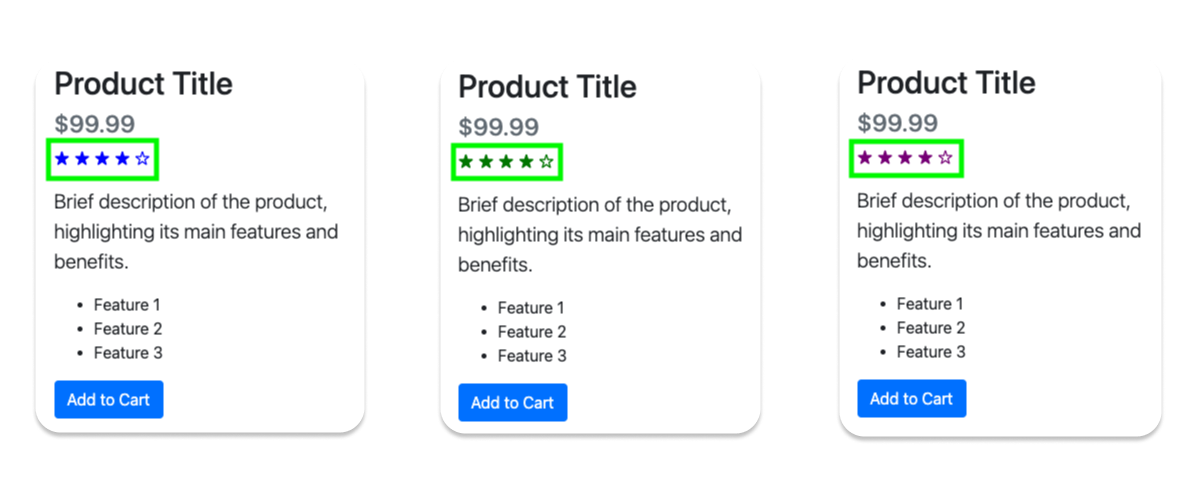
Now I can run this experiment through a full lifecycle (Not started, In progress, Decision made or Abandoned, then Archived) without ever needing to change a line of code, and Statsig will produce the same Experiment Results that you know and love:
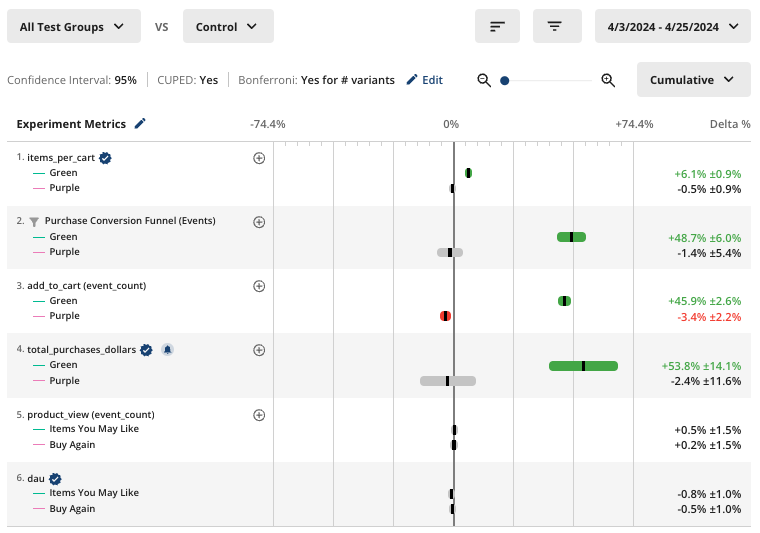
Now, I can either deploy another experiment using the remaining 50% of the layer, or I can simply wait to conclude my rating_color_experiment, then deploy another experiment using 100%, or however much of the remaining Layer population I want to dedicate to my new experiment.

Pro tip: Statsig’s Power Analysis calculator helps you determine just how much of your population you will need for a given experiment.
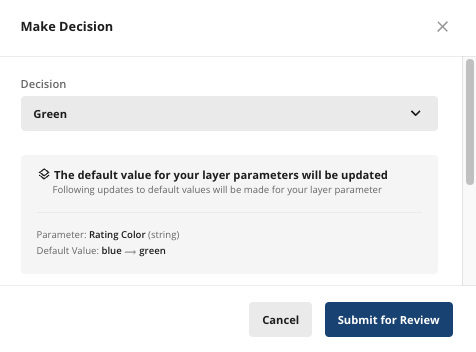
If I ship a winning variation from an experiment within my Layer, I can decide if I want to replace the default parameter values of the Layer with the experiment’s winning variation values:
Thank you!
If you’ve made it this far, thanks for reading!
This should give you a 101-level explanation of how to run product experiments in Statsig using Layers without needing to deploy code every time you want to run a new experiment.
If you have any further questions or clarifications, please join our Slack Community and let us know, or reach out for a customized demo. We’re always happy to chat!
Request a demo


